Implementation of an Active Directory home lab and the creation of several security and group policies.
Lab Introduction
What is Active Directory?
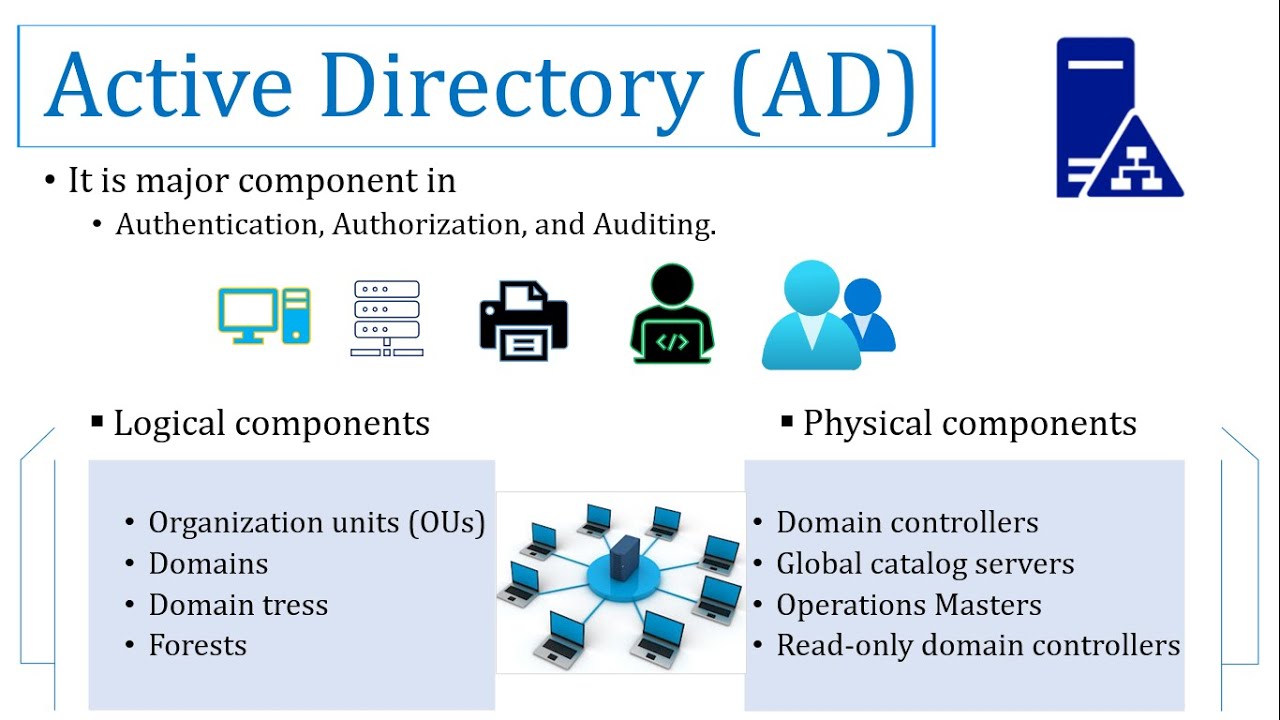
Active Directory (AD) is a Microsoft directory service that acts as a central database for managing and organizing users, computers, and other network resources within a Windows environment. It provides a way for administrators to control access, enforce security policies, and manage authentication and authorization for the entire network from a single location
- How it works
- Centralized management: AD creates a logical, hierarchical structure for network resources, such as users, groups, computers, and printers.
- Authentication and authorization: When a user logs in, AD verifies their identity (authentication) and then determines what they are allowed to access (authorization).
- Domain controller: A server running Active Directory Domain Services acts as the domain controller, which authenticates users and maintains the AD database.
- Group policy: Administrators use Group Policy Objects (GPOs) to apply specific security and configuration settings to users and computers across the network.
- Simplified administration: Instead of managing user accounts on each individual computer, administrators can manage them all from a central point, which simplifies tasks like resetting passwords or creating new accounts.
- Key components
- Objects: Individual items in the directory, like a user account or a computer, are called objects.
- Domains: A logical group of network objects that share the same directory database and security policies.
- Organizational Units (OUs): Containers within a domain that are used to organize users, groups, and computers, often representing departments or locations.
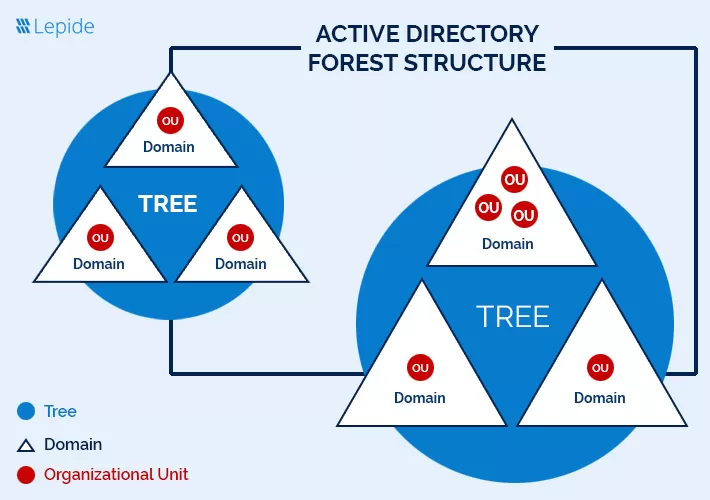
- Forests and Trees: Multiple domains can be grouped into trees, and multiple trees can be linked to form a forest, which allows for relationships and trust between different domains.
In this Lab :
we will begin by setting up Active Directory on Windows Server 2019 and joining a Windows 10 client machine to the domain. so we will need to set up two machines WindowsSever2019 and Windows 10 pro for this Lab.
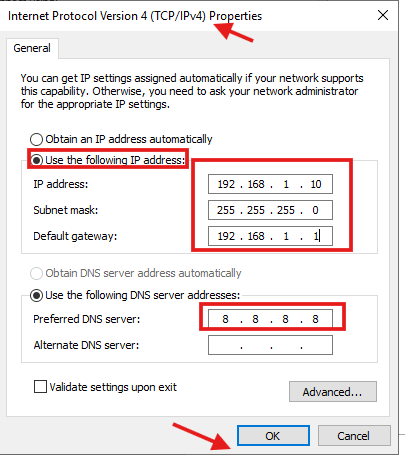
First, we need to set up and configure Active directory on windows server 2019 , so we need to set a static IP 192.168.1.10 and we can do that by right clicking the network icon on the bottom right and select open network & internet settings and click on change adapter options and right click the interface Ethernet and select properties and select and double click on internet protocol version 4 then select use the following ip address and here we will set our ip 192.168.1.10 and set subnet mask 255.255.255.0 and set the defualt getway 192.168.1.1 , then set the DNS 8.8.8.8 which is refers to the Google’s DNS and then click OK to save changs as we can see all of these below:

then we need to check the new changes from cmd by using command : ipconfig as we can se below : 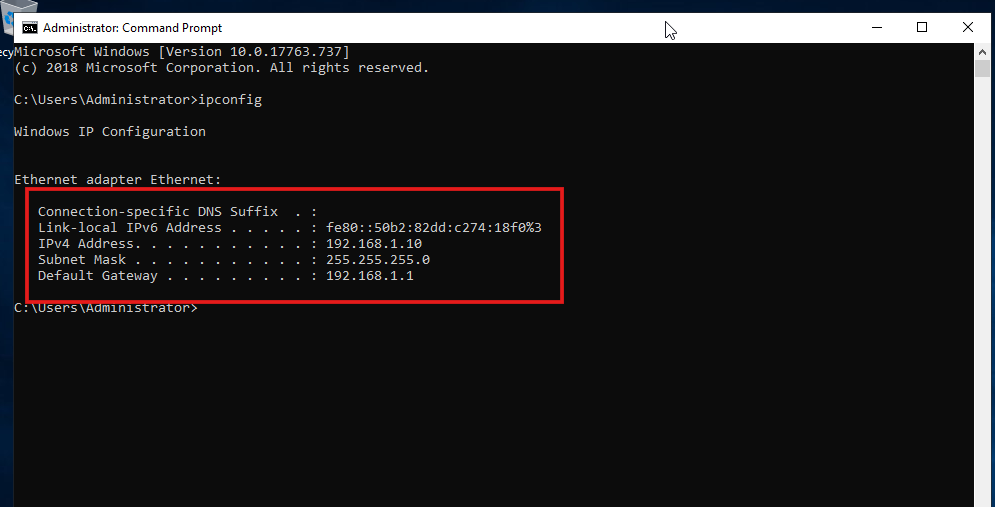
Then we need to go to Server Manager which its icon in the bottom and on the Top right corner we get and select manage then select Add Roles and Features as we can see below: 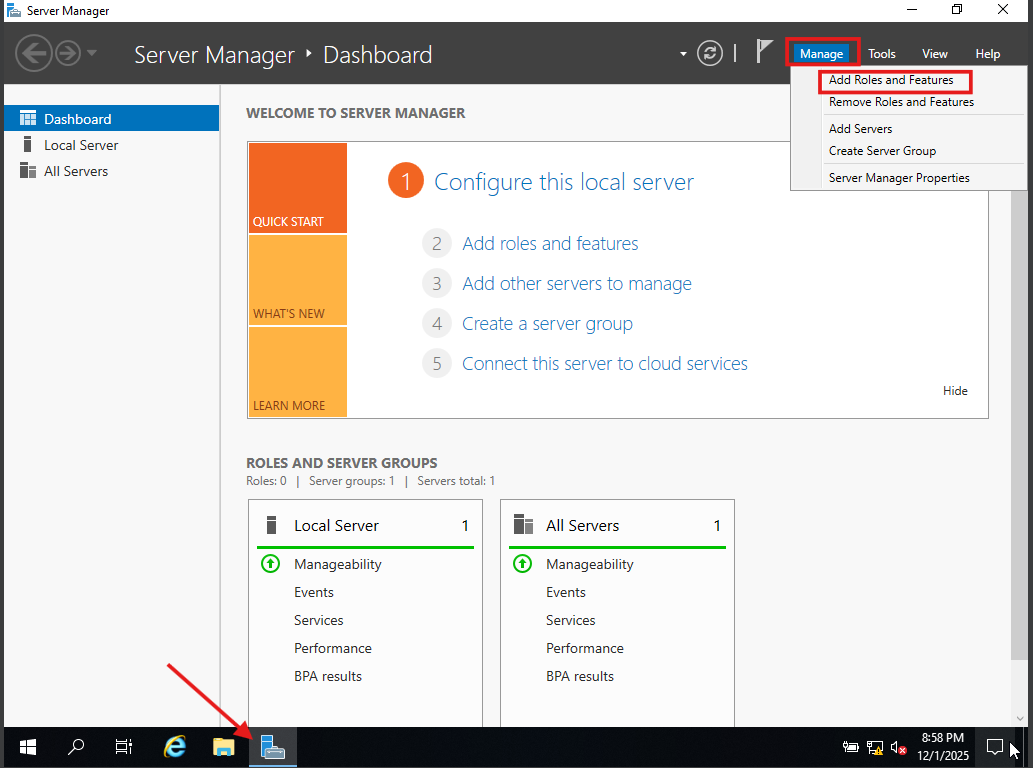 then select
 next and select Role-based or feature-based installation then next as we can see below : 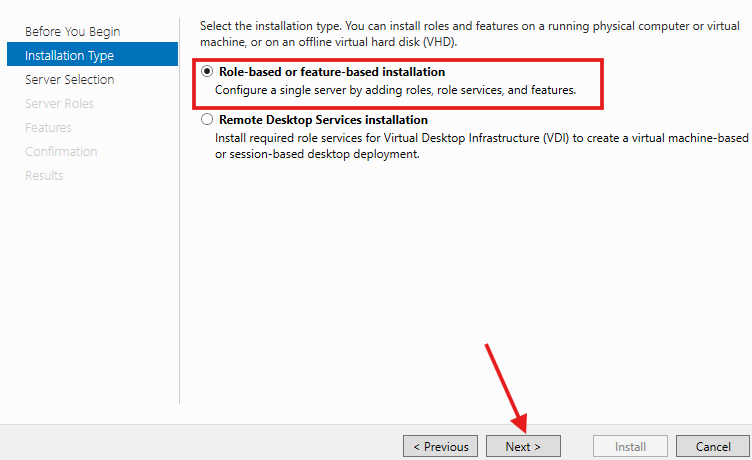
then our servers were listed but in our case we only have one server so the list will be had one server , so choose it and click on next as we can see below : 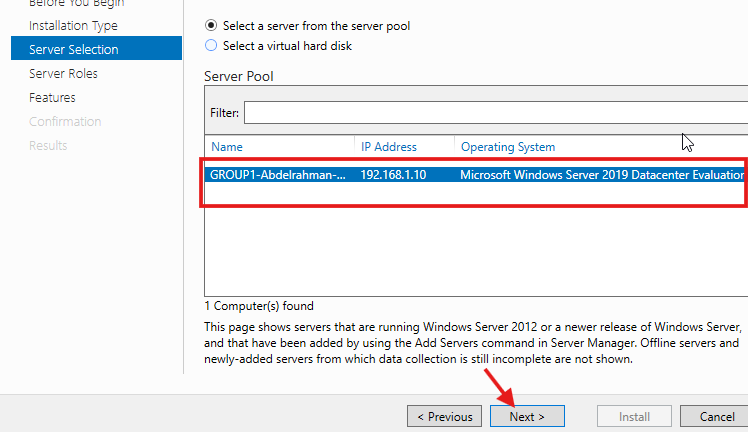
then going to the Server Roles then select the Active Directory Domain Services from list and click on add features then next and next and finally click on install as we can see below: 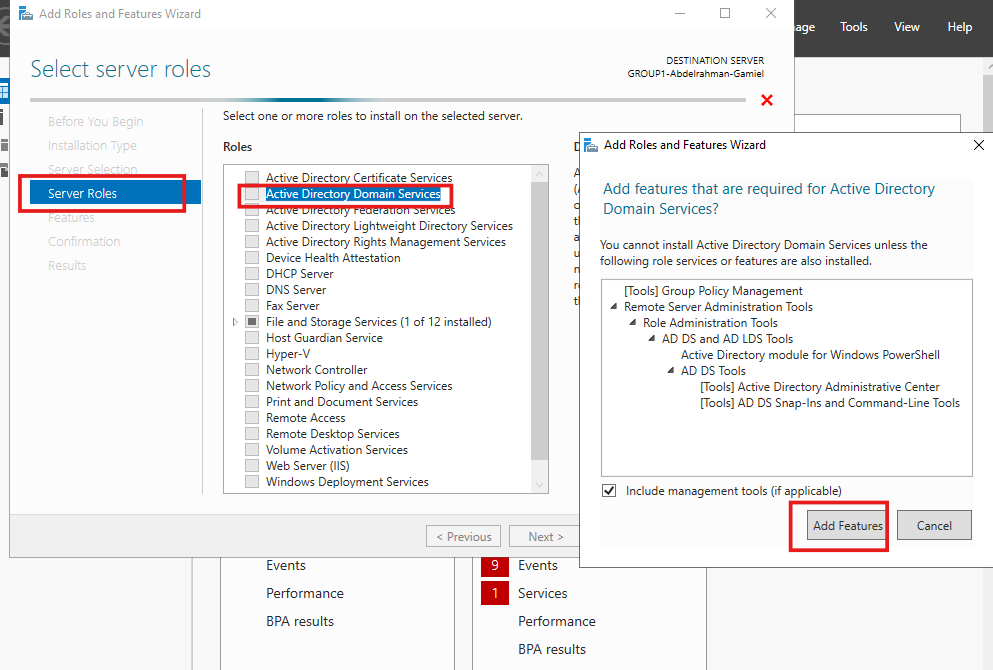
then after installation succeeded click on close as we can see below : 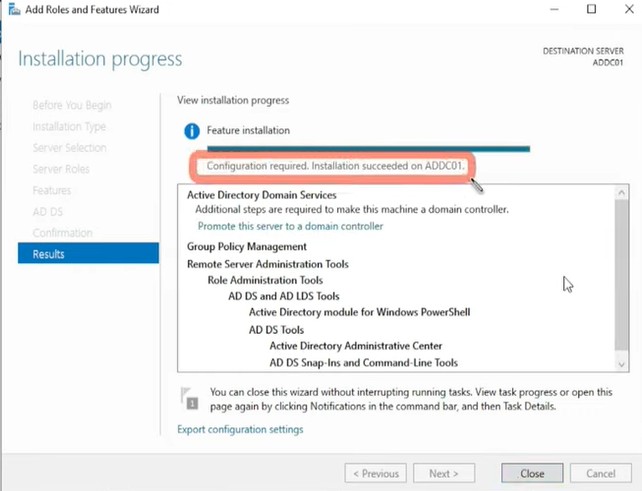
Then the flag icon beside “manage” you want to click on that and you will see Promote this server to a domain contoller and click on that

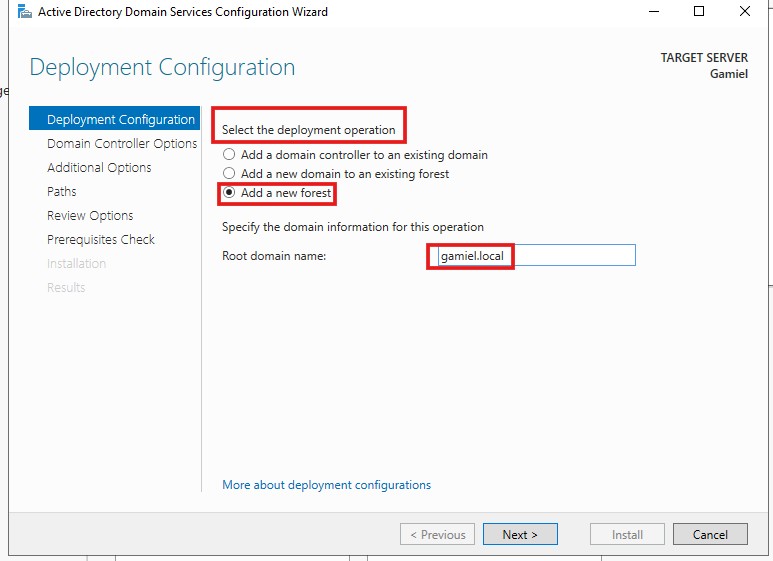
After clicking on Promote this server to a domain contoller we need to select an option from the deployment operation options Then we want to select the option add a new forest because we creating a brand new domain , so in the domain name i will call it gamiel.local , the domain name must have a top level domain , so my domain name can not be gamiel only it must be name . something as we can see below :
Then i will leave everything default and set a password then click next on all steps and install in the last step : 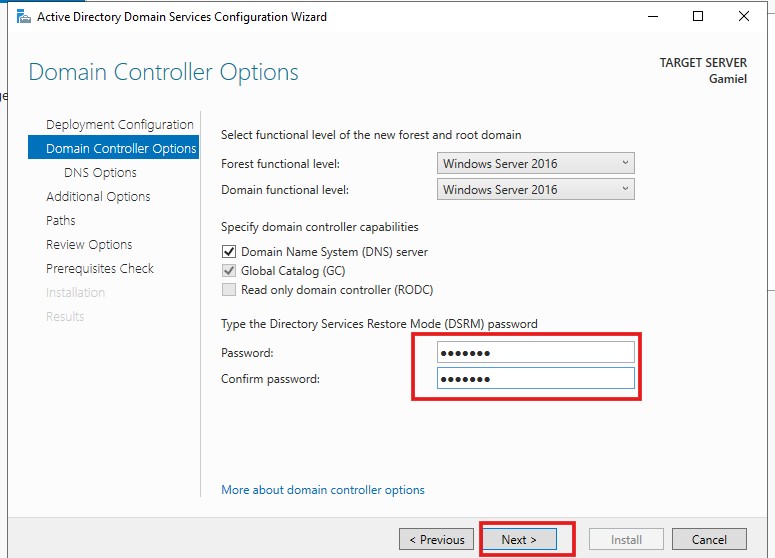 Then After installation successfully our server should Automatically Restart.
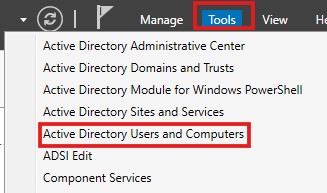
After Restart completed, in our server manger we want to click on Tools at the Top right corner besides manage and select Active Directory Users and Computers
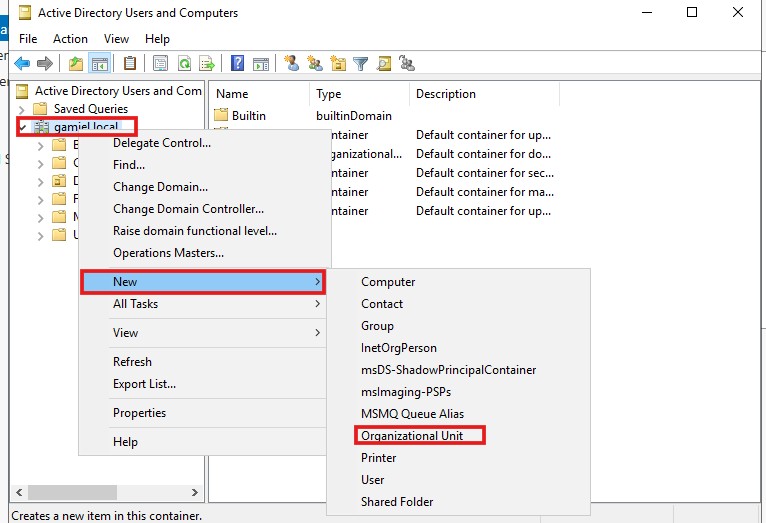
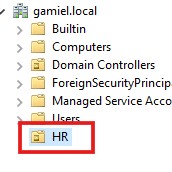
Then we want to create a new user , but in a real world environments it is likely broken up to different departments that means Organzitional Units for example : “HR- SALES - IT …etc” , so we need to create an Organzitional Unit before create a user , so we want to right click on the our domain name and go under new and select Organzitional Unit
and we will name it for example "HR"
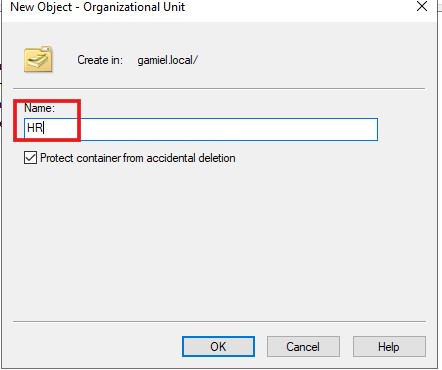
then click on OK , so The Organzitional Unit will appear under users field
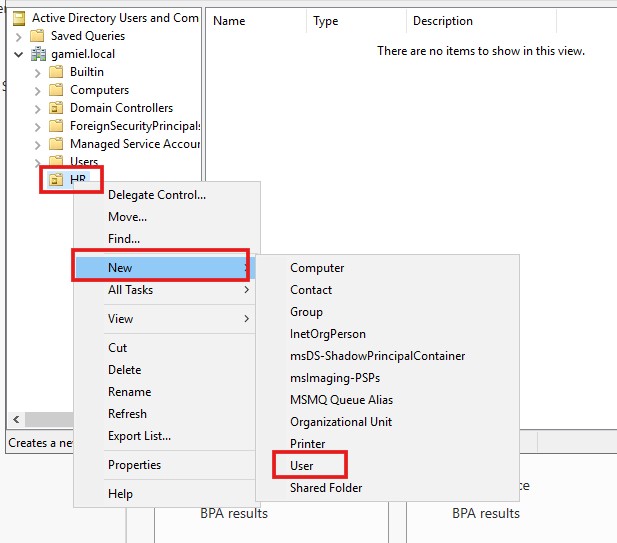
Then , we can create our new user , by in our new unit “HR” we will right click and under new Select User
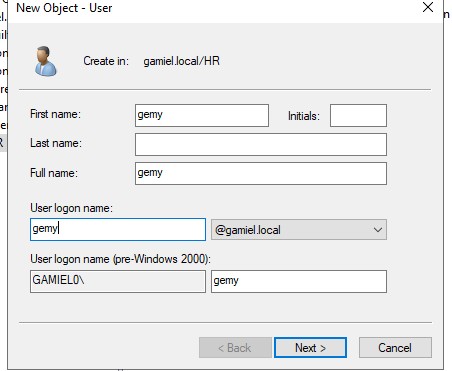
Then we will set the user’s name and click on next
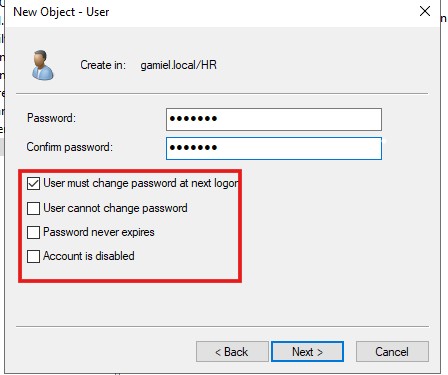
to set the User’s password and you can select a policy from option to apply it on this user for example : “ i want to make this user must change password after next logon”
Now, that we have our Active Directory Setup and our server is now a domian Controller.
so we will now head over to our windows Target Machine and join it to our Created domain.
First , we want to change the IP of machine to 192.168.1.20 and the Following DNS Server Address, then change it to our Domain’s IP : 192.168.1.10 to join it to our domian
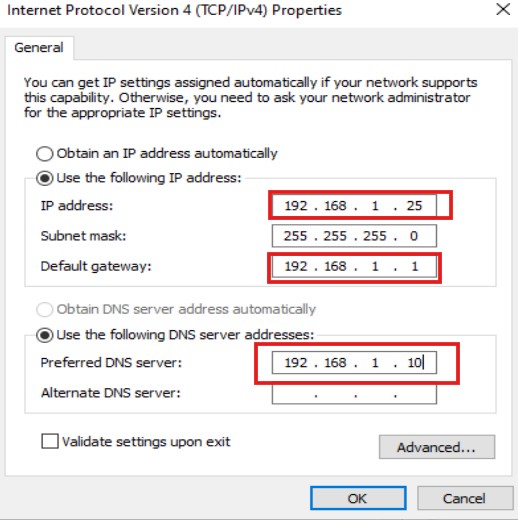
we can do that by right clicking the network icon on the bottom right and then select open network & internet settings and then click onchange adapter options and right click the interface Ethernet and select properties and select and double click on internet protocol version 4 then select use the following ip address and here we will set our ip 192.168.1.25 and set subnet mask 255.255.255.0 and set the defualt getway 192.168.1.1, then set the DNS 192.168.1.10 which is refers to the our domain controller and then click OK to save changs as we can see all of these below:

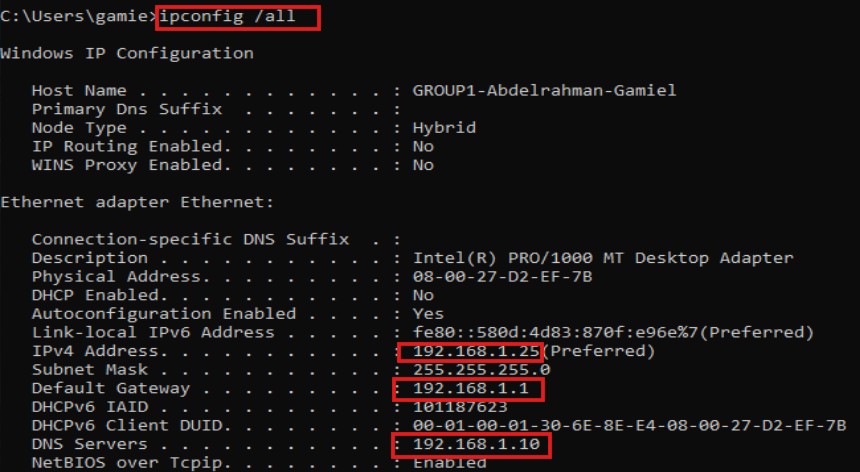
then we need to check the new changes from cmd by using command : ipconfig/all as we can se below :
now, we want to search up PC in start menu and then click on properties 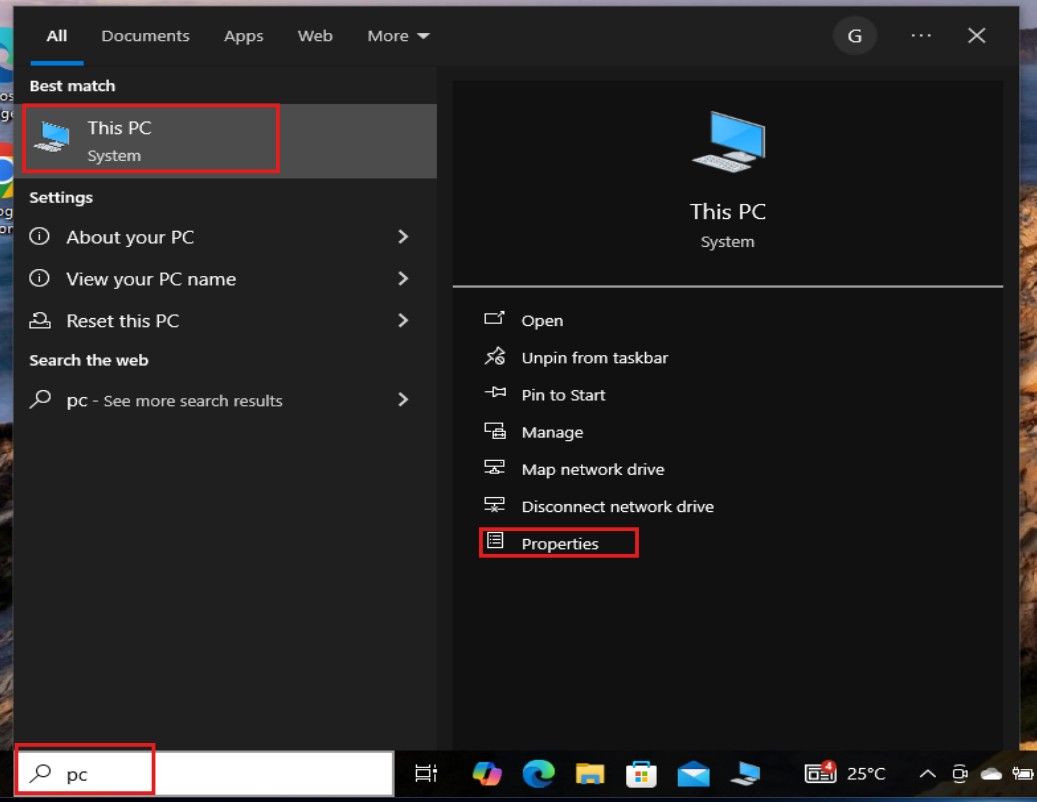
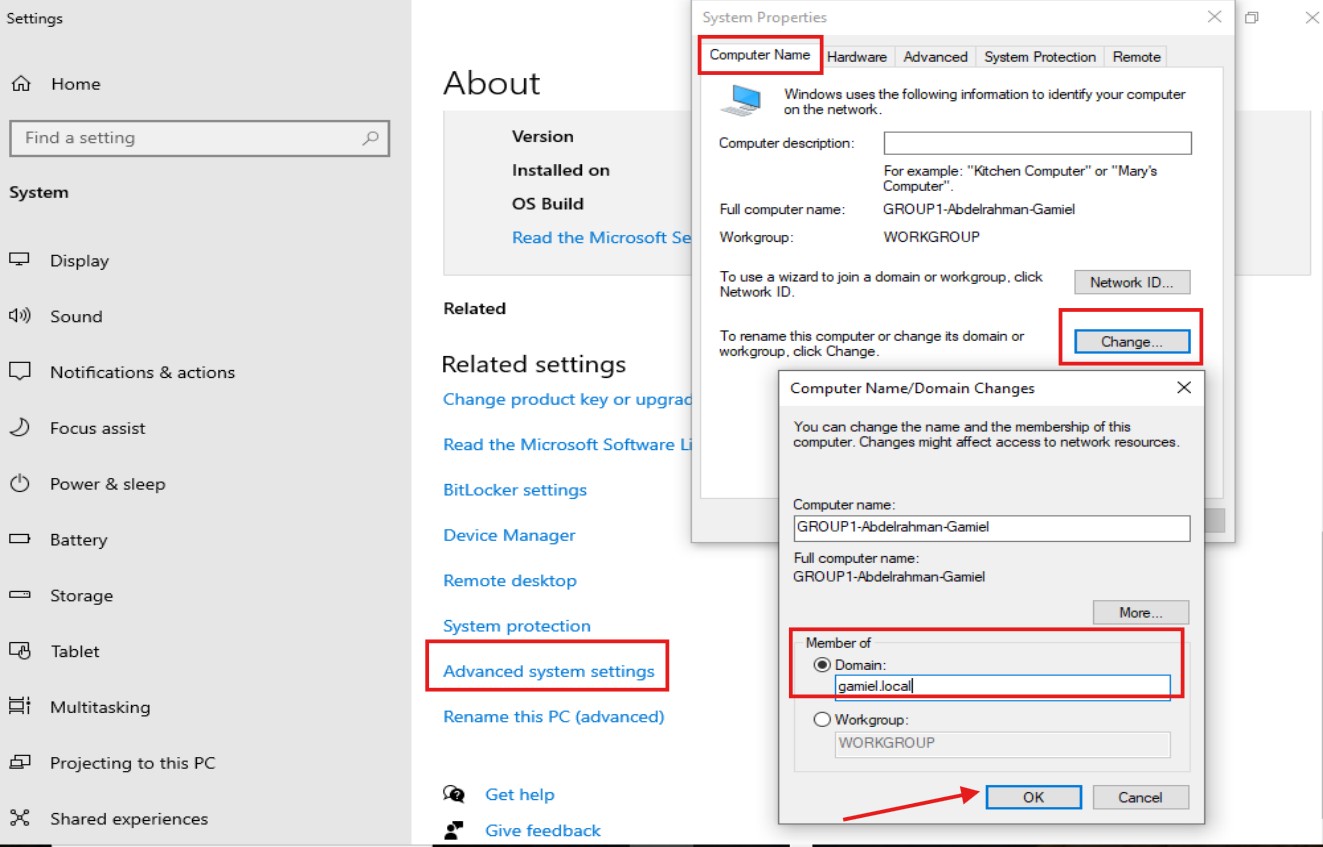
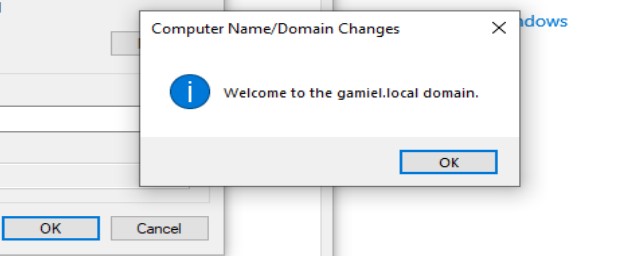
then Scroll down and then we want to select Advanced system settings , then from the tabs we want to click on Computer name tab , then select change and make sure you select domian and type in it our domain’s name : gamiel.local as we can see all of these below:
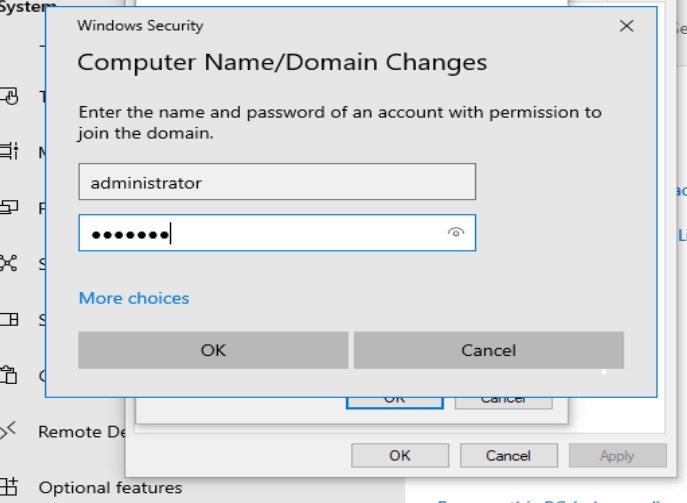
Then we want to enter some credentials of our domain , but we will use the administrator account of the server to login , as this account will have the proper permissions , so username : administrator and password : your administrator password as we can see below :
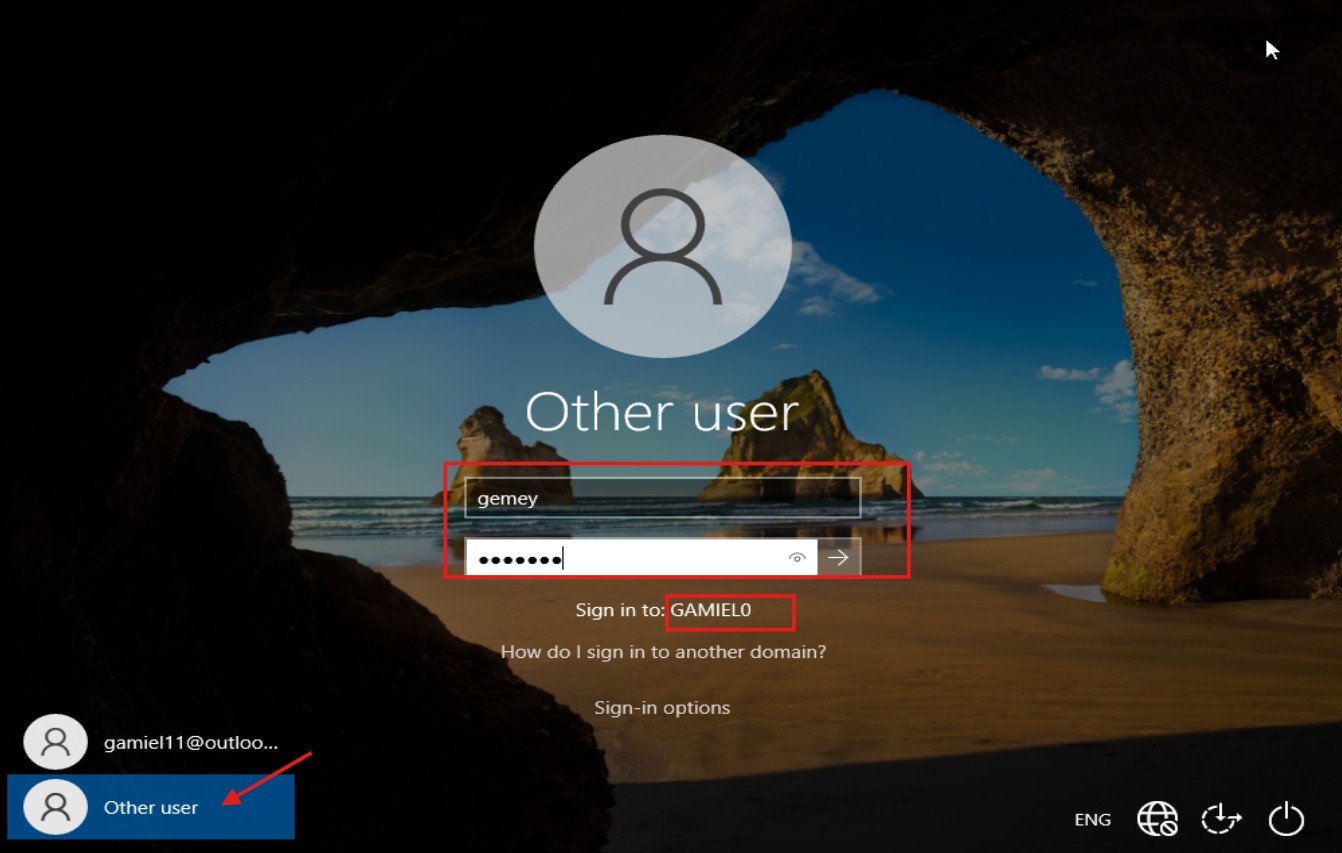
now , we want to log in with our newly created user called gemy , we can do that in by selecting other user on the log on screen and enter the user’s credentials and login as we can see below :