Setting up a web server and WAF (NGINX and Mod Security)
Lab Introduction:
what is web server?
A web server is a system that uses both software and hardware to deliver web content, such as web pages, images, and videos, to users’ browsers. The hardware is a physical computer that stores website files and connects to the internet, while the software is the program that listens for and responds to requests from clients (like browsers) using the HTTP protocol. Essentially, when you type a URL into your browser, the browser sends a request to the web server, which then sends the requested files back to be displayed 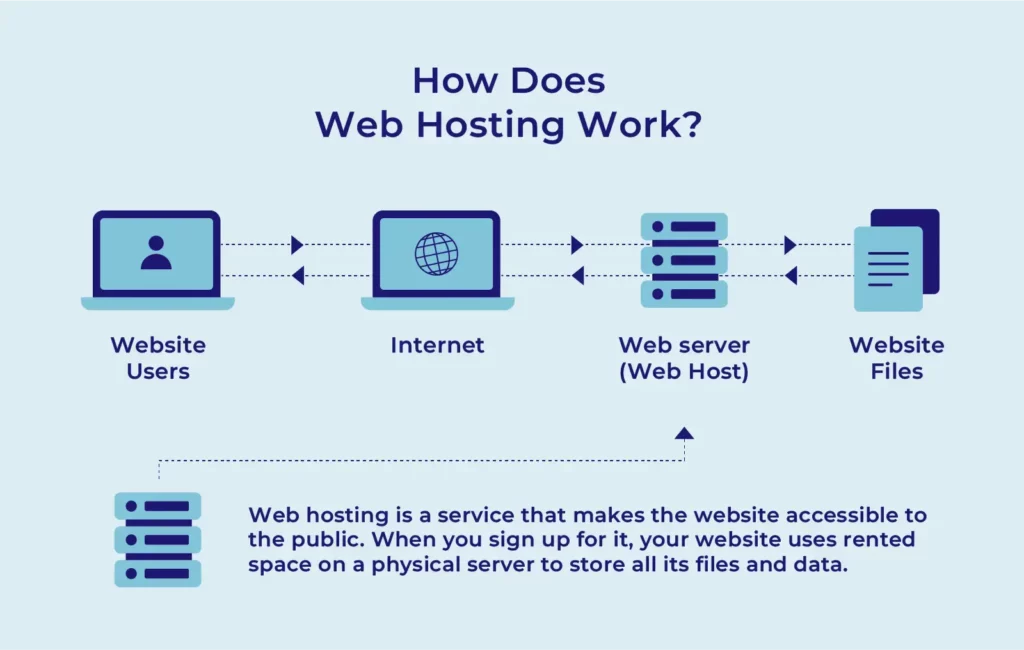
Examples:
- Software: Popular web server software includes Apache, Microsoft’s IIS, and Nginx.
- Hardware: A web server can be a dedicated computer, a personal computer, or even a smaller device like a Raspberry Pi.
what is the WAF?
- A WAF, or Web Application Firewall, is a security solution that monitors and filters
HTTP/S trafficbetween a web application and the internet to protect it from cyberattacks. It acts as a reverse proxy, inspecting incoming requests to block malicious activity such as SQL injection, cross-site scripting (XSS), and other application-layer threats before they can reach the web application. - A WAF is a
protocol layer 7 defense (in the OSI model), and is not designed to defend against all types of attacks. This method of attack mitigation is usually part of a suite of tools which together create a holistic defense against a range of attack vectors. - By deploying a WAF in front of a web application, a shield is placed between the web application and the Internet. While a proxy server protects a client machine’s identity by using an intermediary, a WAF is a type of
reverse-proxy, protecting the server from exposure by having clients pass through the WAF before reaching the server.
In this lab
we built a practical environment to simulate running a Web Server protected with) Nginx and ModSecurity( as a Web Application Firewall (WAF). The goal of this lab is to understand how a WAF works, how it integrates with a web server, and how it detects and blocks common attacks such as XSS and Command Injection.
The lab was structured in several key steps:
- Installed Nginx on the server as the base web server.
- Installed and configured ModSecurity, integrating it with Nginx as a dynamic module to provide application-level protection.
- Added the OWASP Core Rule Set (CRS) to detect and block the most common web attacks.
- Created test pages:
- A page to test Command Execution attempts, showing how ModSecurity prevents command injection.
- A page to test XSS payloads, showing how ModSecurity filters malicious scripts.
- Simulated real-world attacks using real payloads to see the difference between:
- ModSecurity enabled (active protection).
- ModSecurity disabled (no protection).
This lab allows trainees to:
- Understand how to deploy and configure a WAF on real servers.
- Observe live logs of attack attempts.
- Learn how to customize rules for specific applications.
- Compare a secure and an insecure environment under identical conditions.
- By the end of this lab, you will have a hands-on training environment to test common attacks and learn how to fine-tune protection — an essential skill for both Pentesters and Blue Teamers.
Installed Nginx on the server as the base web server && installed and configured ModSecurity, integrating it with Nginx :
First, update the package and install some libraries that we need on ubuntu server 22.04. “sudo apt update && sudo apt upgrade” Install libraries that are needed for our installation process from source of modsecurity 3. “sudo apt install gcc make build-essential autoconf automake libtool libcurl4-openssl-dev liblua5.3-dev libfuzzy-dev ssdeep gettext pkg-config libgeoip-dev libyajl-dev doxygen libpcre++-dev libpcre2-16-0 libpcre2-dev libpcre2-posix3 zlib1g zlib1g-dev -y”
- And then we want to download the Modsecurity-nginx connector by this command:
“cd /opt && sudo git clone https://github.com/owasp-modsecurity/ModSecurity-nginx.git” - And then we need to add repository from ondrej and update our package then make update by this commands :
“sudo add-apt-repository ppa:ondrej/nginx -y” and “ sudo apt update “` we can show these steps below: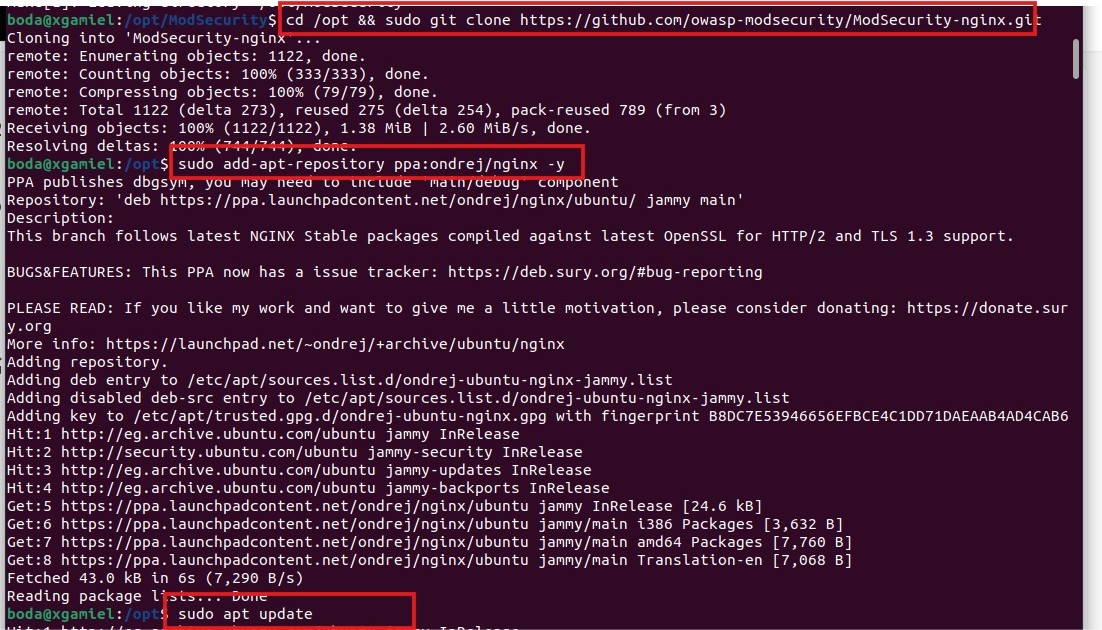
And then we can install nginx by this command “sudo apt install nginx -y”we can show this step below: 
And then we can enable the nginx after installation by this command“sudo systemctl enable nginx” and show status of this nginx to ensure that it works or not by this command: “sudo systemctl status nginx” we can see these steps below: 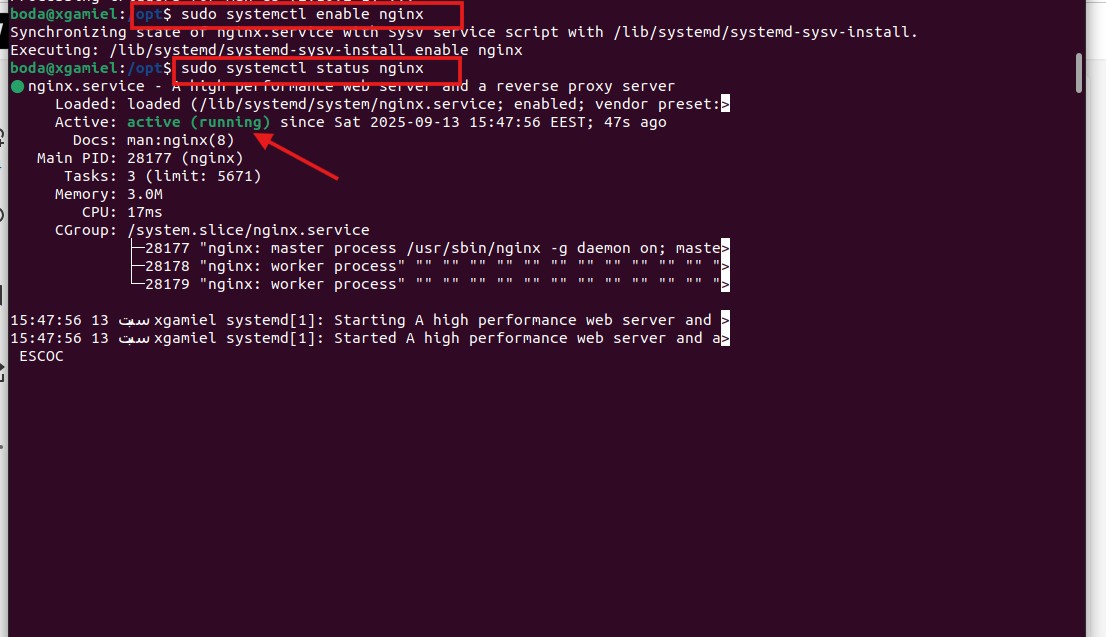 We also need to check our nginx version by this command
 "sudo nginx -v" nginx version:" nginx/1.28.0” and, We should download source code that match version on nginx we recently installed we can do that by these commands:” cd /opt && sudo wget https://nginx.org/download/nginx-1.28.0.tar.gz sudo tar -xzvf nginx-1.28.0.tar.gz "cd nginx-1.28.0” and we can see these steps below:  then we can Install Modsecurity and we will install modsecurity from source by these commands:
cd /opt && sudo git clone https://github.com/owasp-modsecurity/ModSecurity.gitcd ModSecuritysudo git submodule init"sudo git submodule update”after making that we need to build and configure the WAF by these commands:
” sudo ./build.sh""sudo ./configure""sudo make""sudo make install”
we can see this below: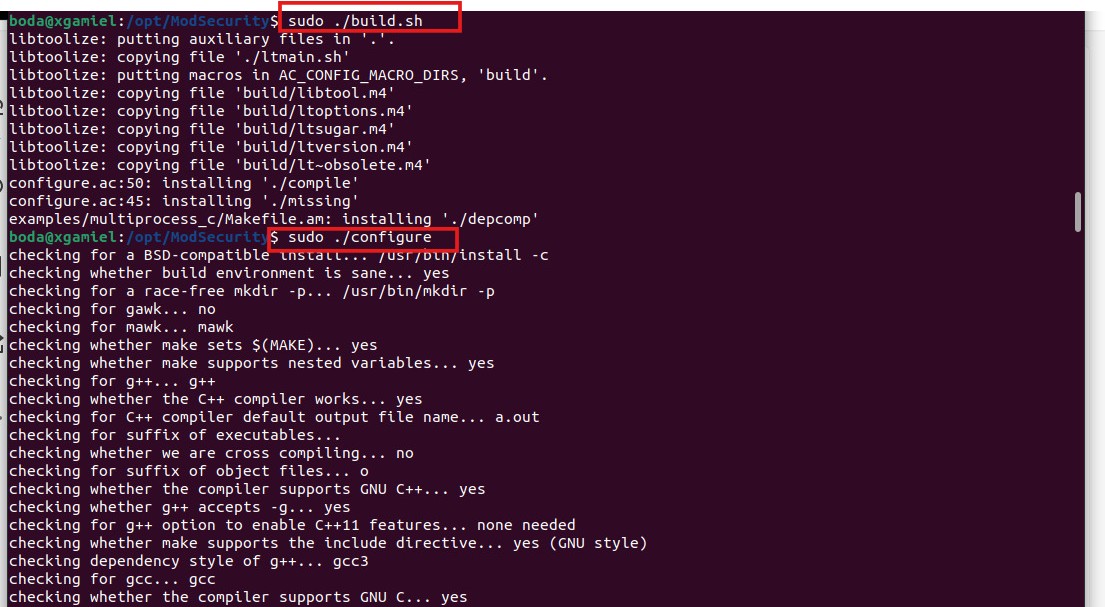 After we download, extract and change directory to nginx source, we build nginx with module -on modsecurity that we successfully installed above by these commands:
“sudo ./configure --with-compat --add-dynamic-module=/opt/ModSecurity-nginx""sudo make && sudo make modules”and we can see it below: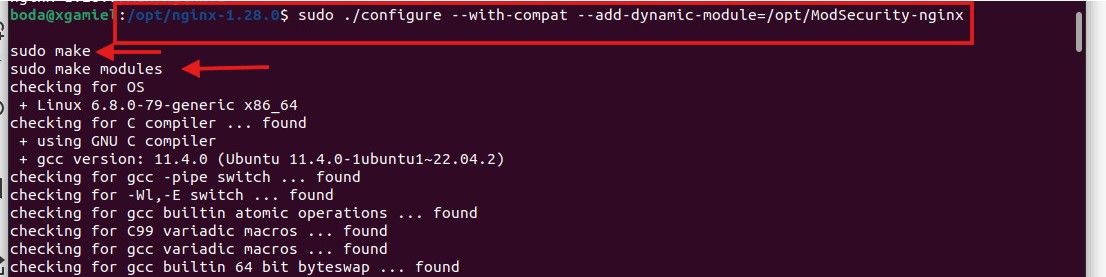 Next, we copy the modules to nginx modules-enabled, also copy configuration of modsecurity and Unicode by these commands:
“sudo cp objs/ngx_http_modsecurity_module.so /etc/nginx/modules-enabled/""sudo cp /opt/ModSecurity/modsecurity.conf-recommended /etc/nginx/modsecurity.conf""sudo cp /opt/ModSecurity/unicode.mapping /etc/nginx/unicode.mapping”we can see it below: Then after we copied the files, we should enable Modsecurity in
 nginx.conf by edit configuration of nginx to load module of modsecurity by this command;“sudo nano /etc/nginx/nginx.conf”and add this line to the main configuration“load_module /etc/nginx/modules-enabled/ngx_http_modsecurity_module.so;”Then press“ctrl +o” to save and “ctrl+x “to exit and try this command:“sudo nginx -t”to test these configurations was made successfully or NOT we can see these all process below: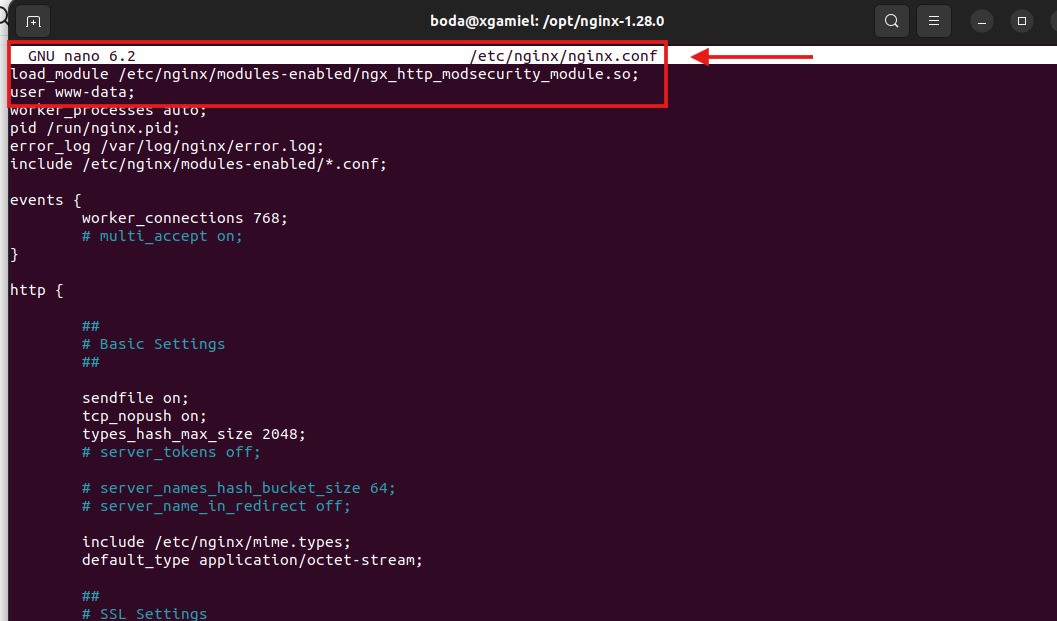
 Then, we also need to modify the server block to activate modsecurity by this command:
 “sudo nano /etc/nginx/sites-enabled/default”and make this configuration inside this file:“modsecurity on"and"modsecurity_rules_file /etc/nginx/modsecurity.conf.”then save and exit to test configurations we can this process below: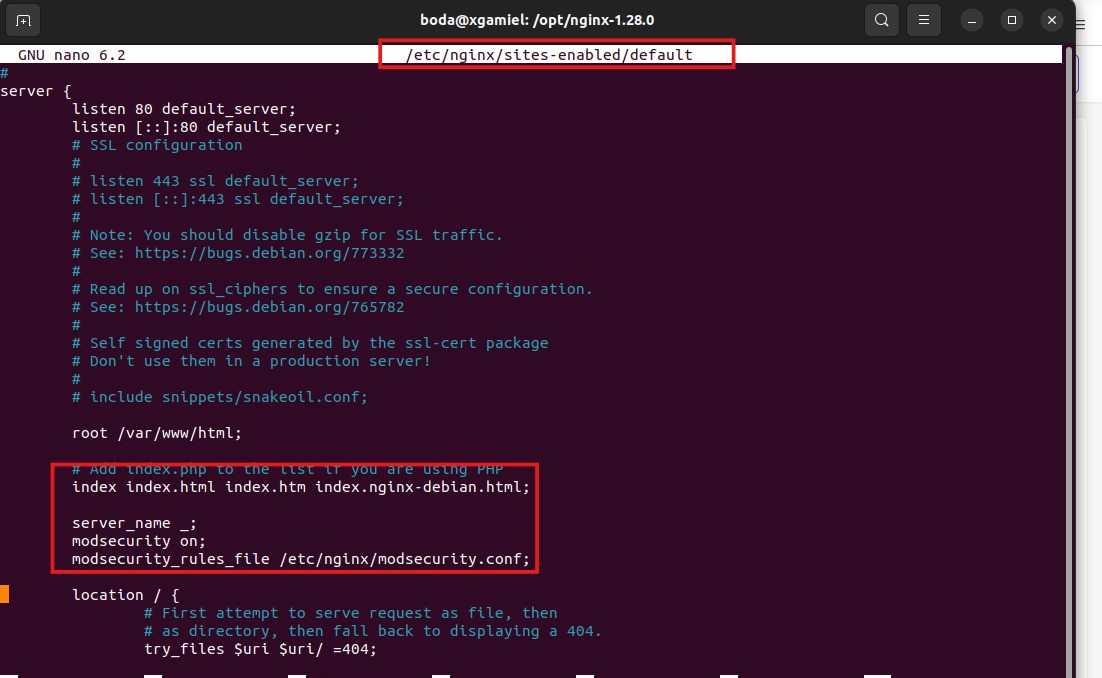
 and edit
 “/etc/nginx/modsecurity.conf”to change“SecRuleEngine to On"by these commands:” sudo nano /etc/nginx/modsecurity.conf”and then save and exit to test configuration after do that, restart nginx server by this commandsudo systemctl restart nginxthen we can see these processes below: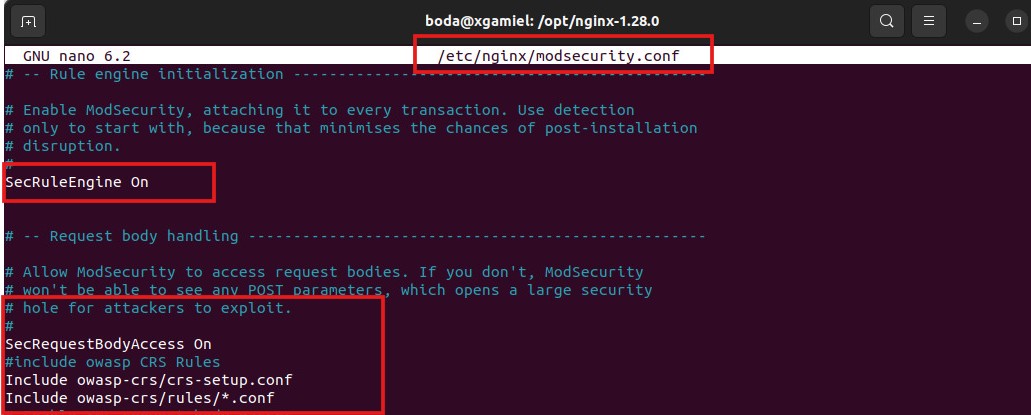
 Then We need to download core rule set from
owasp, owasp crs provide rule to check if the client request has malicious code or not. We directly download owasp crs to nginx configuration directory by this command:“sudo git clone https://github.com/coreruleset/coreruleset.git /etc/nginx/owasp-crs” Then we copy the configuration to
 “sudo cp /etc/nginx/owasp-crs/crs-setup.conf{.example,}”and we need to update our modsecurity configuration toload owasp crsby this command“sudo nano /etc/nginx/modsecurity.conf”and then put these configurations:”Include owasp-crs/crs-setup.conf” and “Include owasp-crs/rules/*.conf”then save and exit to test these configurations we can see these processes below: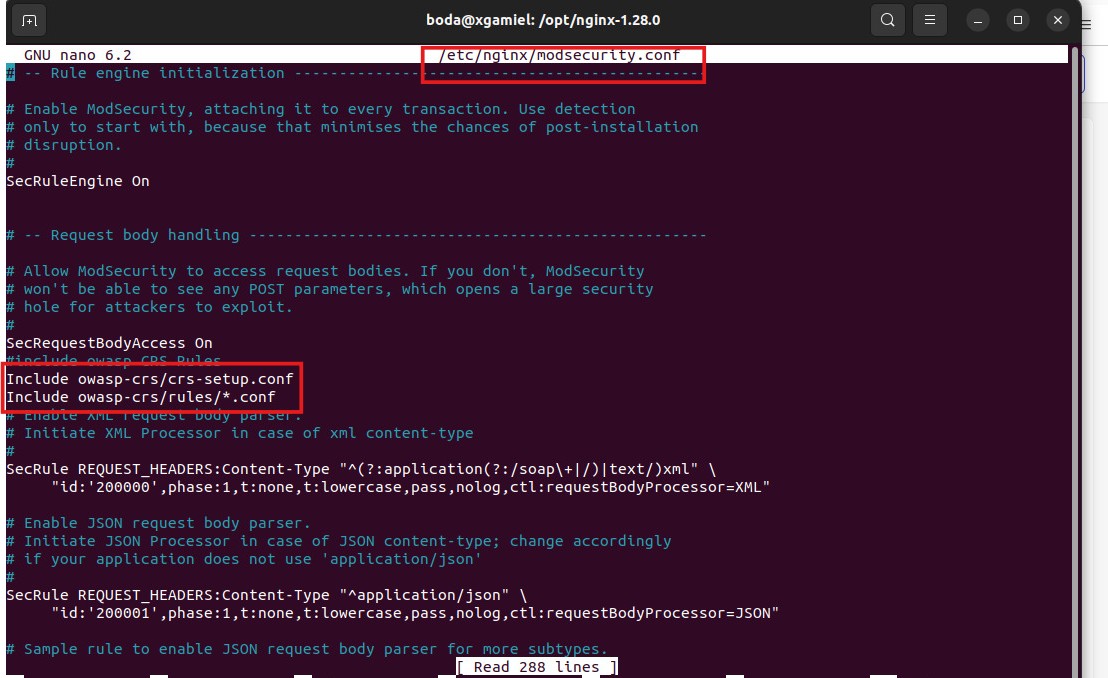
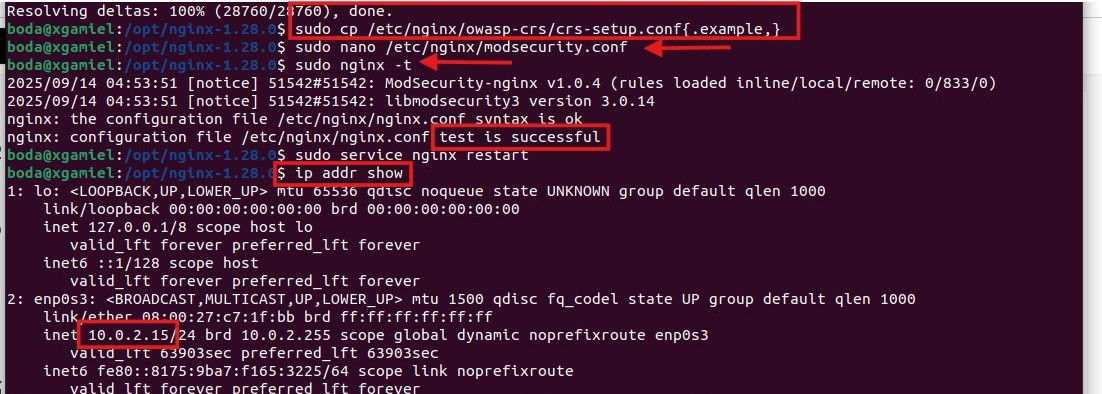 Then we take the machine’s IP and going to the browser to check if the web the web server has installed successfully or not by searching about this:
 ” http://<ip_local_host>in my machine = 10.0.2.15 =http://10.0.2.15then we can see that the nginx installed successfully: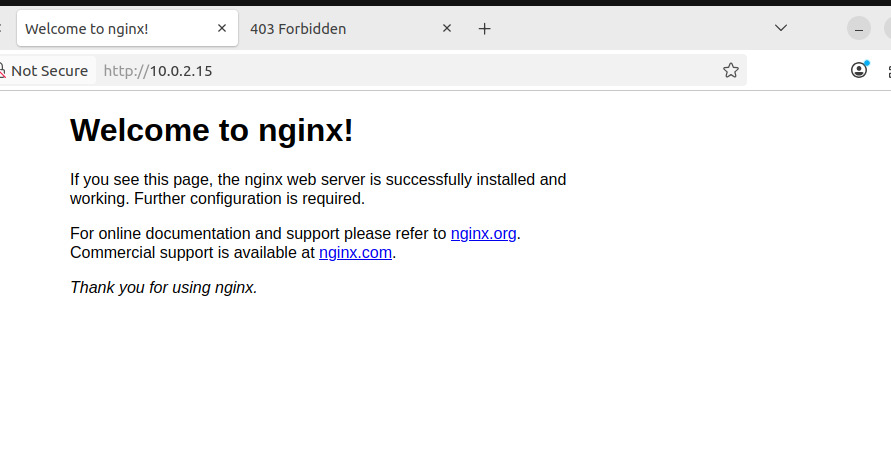 Then we need to Create a simple web page for example by(php&html&css) to test the configurations of the WAF, but first we should install the PHP package on machine to be able to write the code of the web page that we can see below:
 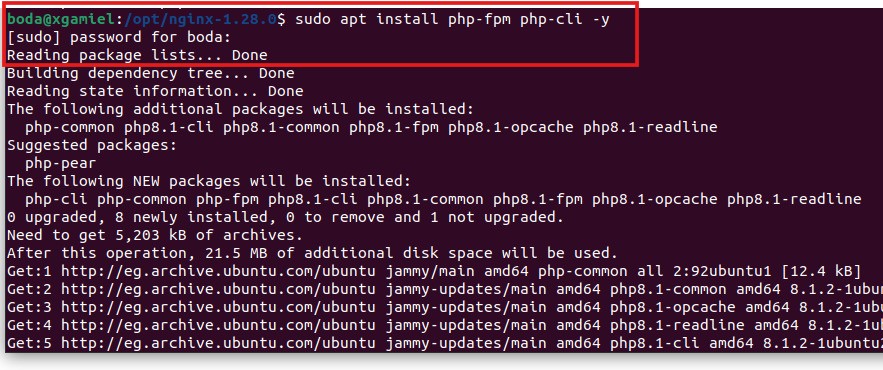 Then we need to edit some configurations about
 “php” locationin the file“/etc/nginx/sites-enabled/default“and uncomment lines of php configurations by this command:“sudo nano /etc/nginx/sites-enabled/default“that we can see it below: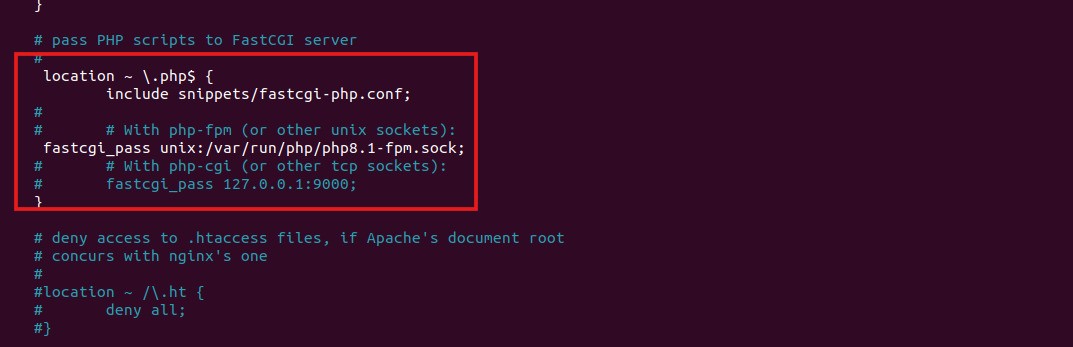 Then we need to create a file in html files to write the code of the web page implementation and save it by using this command
 “sudo nano /var/www/html/demo.php*“then write your code in this file and save, it that we can see that below: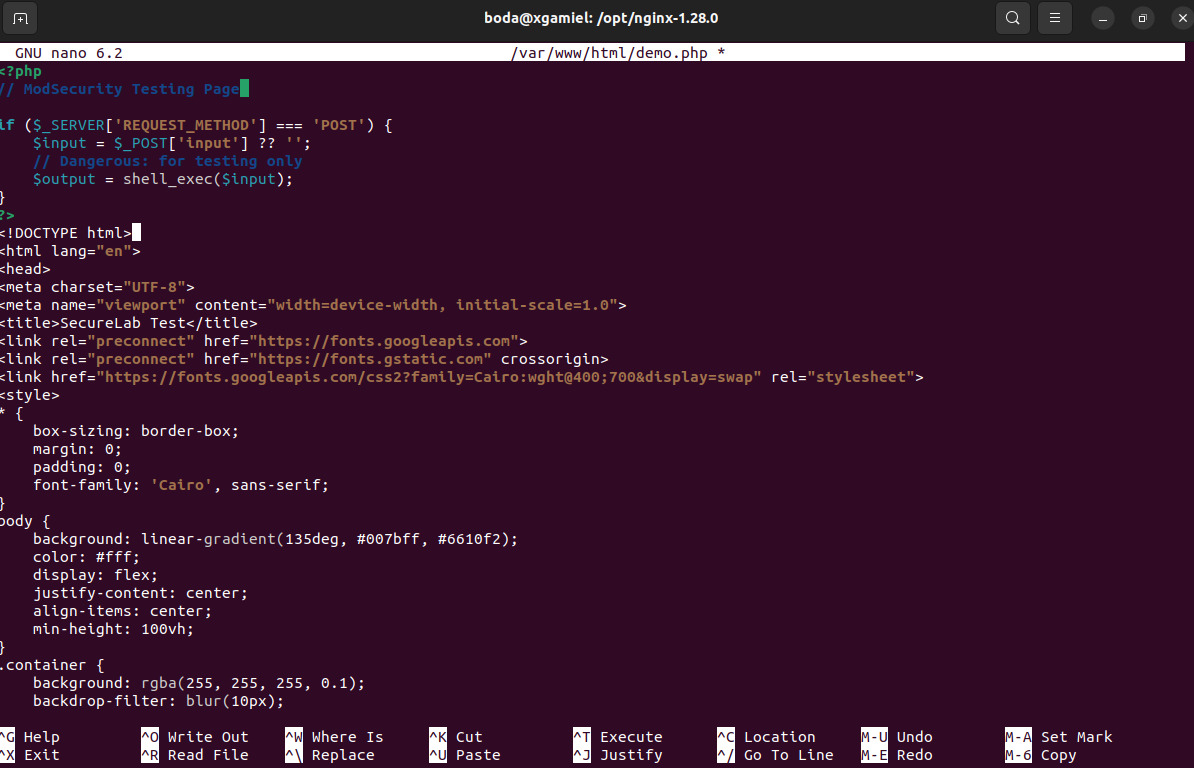 Then we can test it by going to the browser and searching by this:
“http://<local_host_ip> + file name that has the code“that in my machine =“http://10.0.2.15/demo.php”and we can see it below: the web page was created successfully and I will test a maliciousXSSpayload in input bar”<script>alert(1)</script>”to test the WAF configurations and check if it is working successfully or not, that shown in the below photo: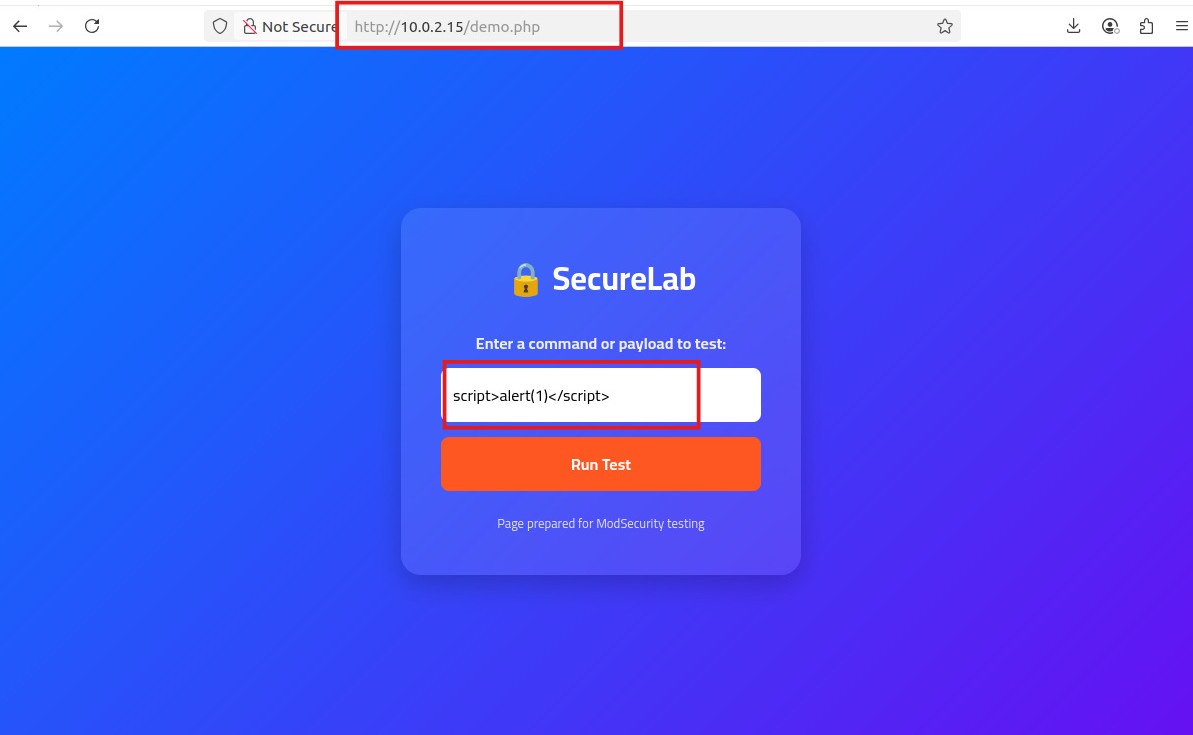 After you press on the bottom
 “Run test”theWAF will detect the malicious code of XSSand will return“403 forbidden page“that we can see it below: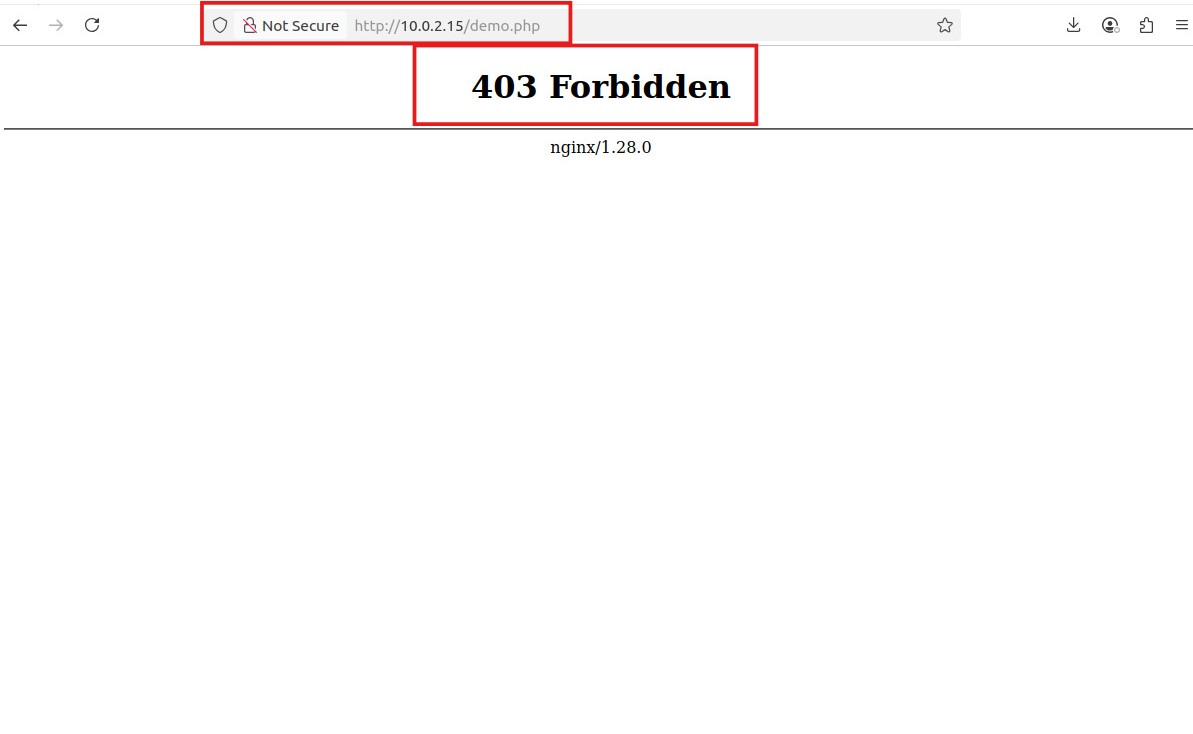
So, the WAF is Working correctly.
Then we can try to stop the WAF and making these malicious activities we can do it by editing the file “/etc/nginx/sites-enabled/default” and change the status of mod security from “ON” to “OFF” as we can see below:  so,
so, without WAF these malicious activities can be executed successfully and As we can see below, when i write a command line like this ”LS”in the input bar, then the command executed and retrieved the data: 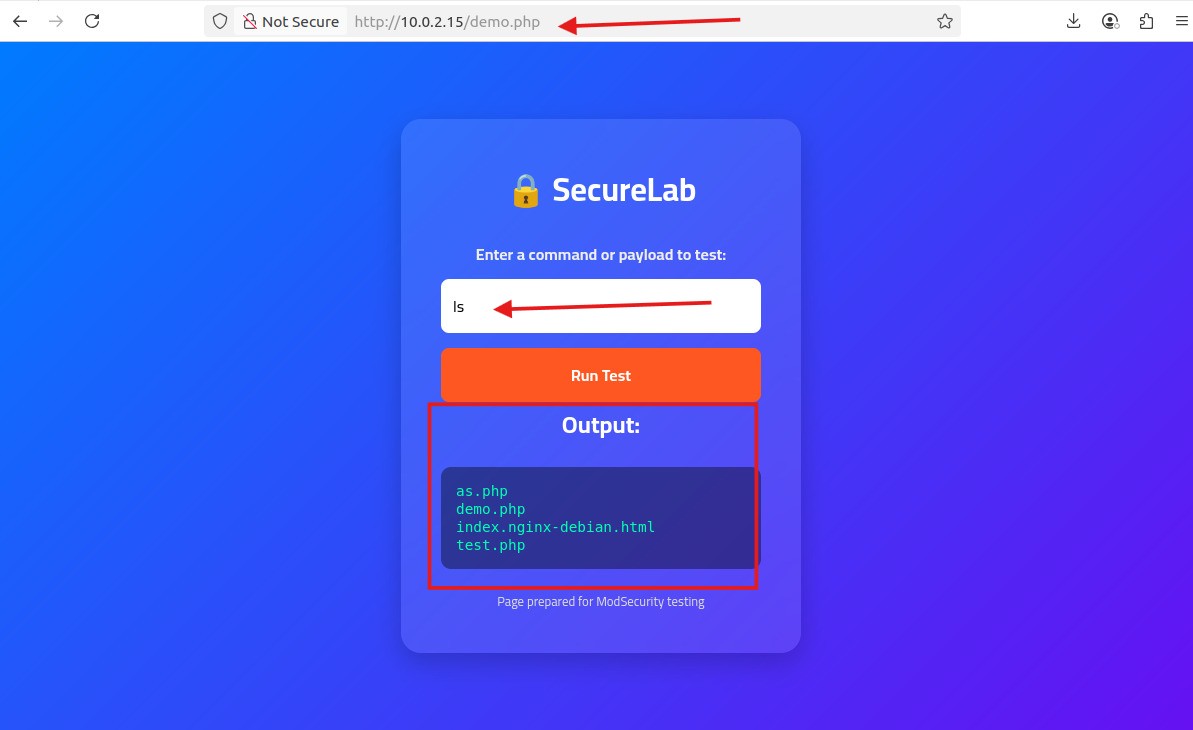 I tested injection of a malicious XSS payload in our page without a WAF, and the payload executed
 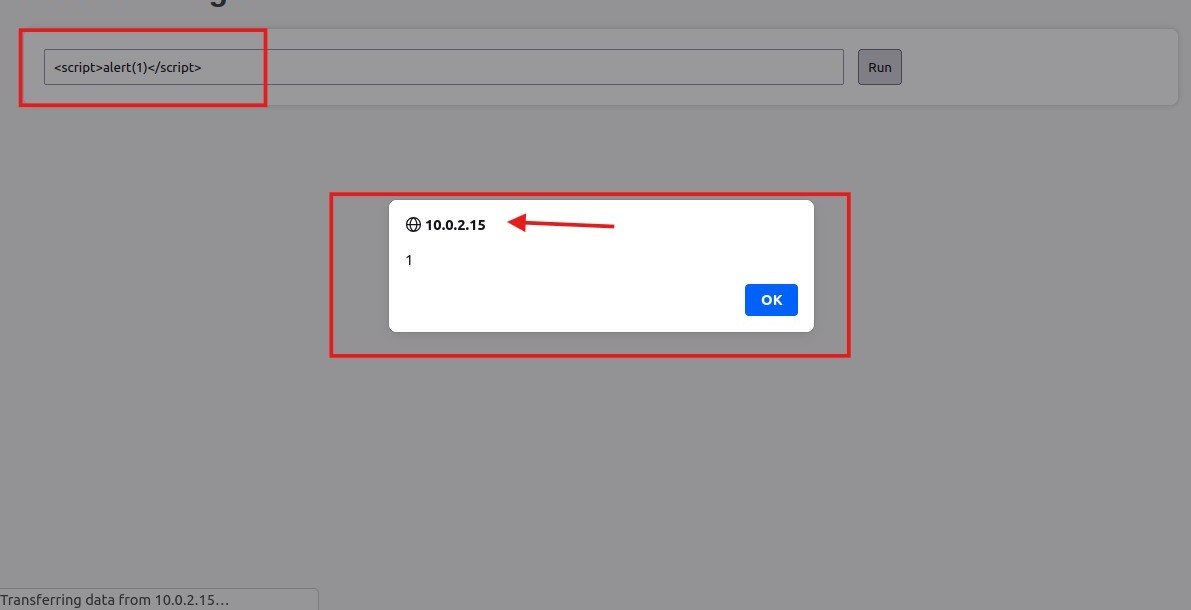 Finally, we will retrieve the status of the
 Mod security to “ON” again to detect these activities as we can see below: 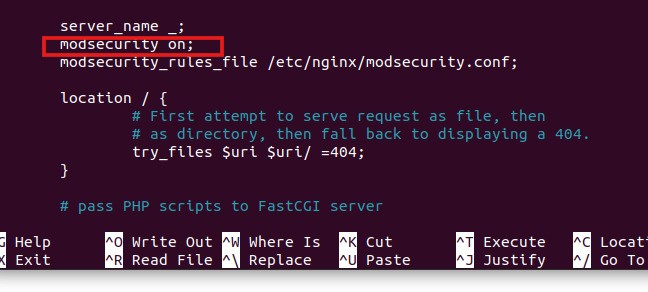
Then if we will test these activities again the WAF will detect them and show “403 forbidden page” for example, after i attempted to execute the “Whoami” Command line the WAF detected it as we can see below: 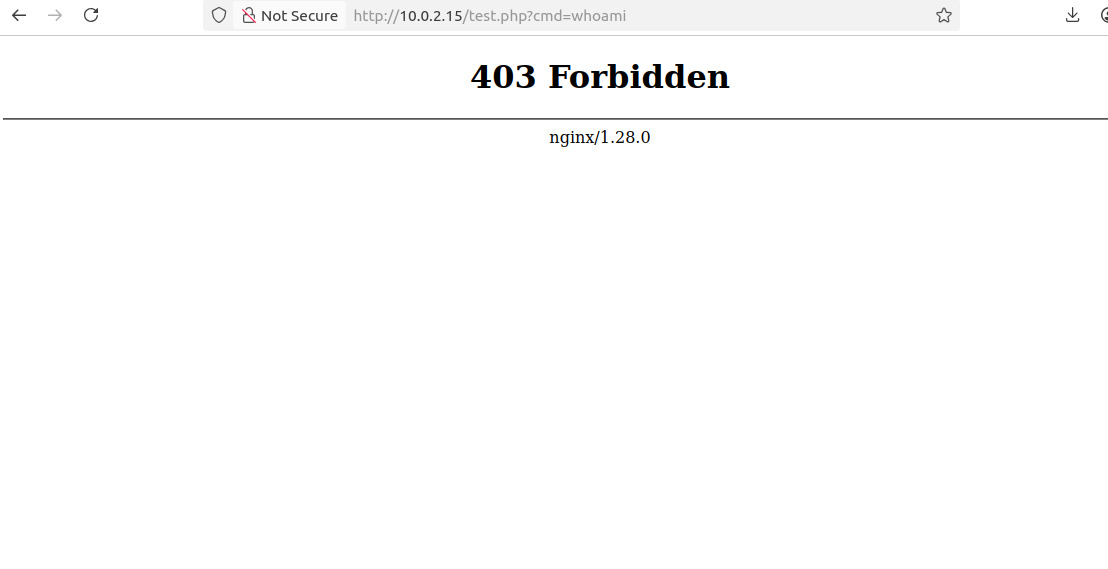 We can check that in the Logs of WAF by going to the error logs by the command:
“sudo tail -f /var/log/nginx/error.log” as we can see below: 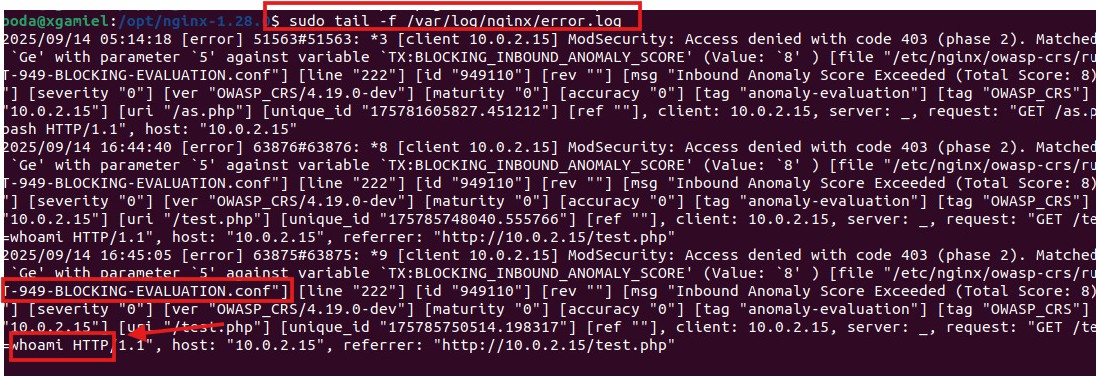
Then we can say that we have finished the lab successfully
Lab Conclusion
This lab successfully showed how to deploy and integrate ModSecurity WAF with Nginx to protect a web server from common attacks.
- By installing the OWASP Core Rule Set and configuring test pages for Command Execution and XSS, we were able to clearly observe the difference between an unprotected server and one protected by a WAF. ### Key takeaways from the lab include:
- Understanding WAF integration: how ModSecurity works as a dynamic module with Nginx.
- Hands-on testing: running real-world attack payloads and seeing ModSecurity detect and block them.
- Rule customization: how enabling or disabling certain rules affects security and usability.
- Practical security awareness: appreciating the importance of WAFs in reducing the risk of common web vulnerabilities.
By the end of the lab, we built a fully functional, test-ready environment that shows both the power of preventive security measures and the impact of misconfiguration or disabling protections. This environment can now be used as advanced web security testing.